Introduction
Stone cladding adds elegance, texture, and realism to architectural designs. If you’re using Floorplanner for home or office projects, learning how to add stone cladding in Floorplanner can elevate your designs. This guide provides step-by-step instructions, expert tips, and optimization techniques to help you apply stone cladding seamlessly in Floorplanner.
Why Use Stone Cladding in Floorplanner?
Stone cladding is a popular architectural feature that brings sophistication and texture to buildings. Here’s why you should incorporate stone cladding into your Floorplanner designs:
- Aesthetic Appeal: Enhances the visual appeal of walls and facades.
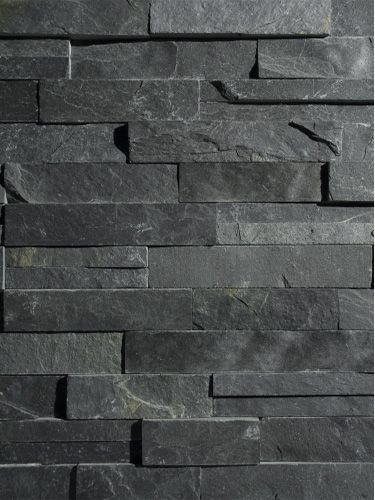
- Realistic Visuals: Provides a life-like representation of textures.
- Versatility: Works well in interior and exterior designs.
- Professionalism: Helps create more detailed and realistic architectural drafts.
Step-by-Step Guide on How to Add Stone Cladding in Floorplanner
Step 1: Select the Wall for Cladding
- Open Your Project: Log in to Floorplanner and select an existing project or create a new one.
- Choose the Wall: Click on the wall segment where you want to apply stone cladding.
- Adjust Wall Dimensions: Ensure the wall height, width, and depth align with your design needs.
Step 2: Access the Material Tool
- Locate the Paint Bucket Tool in the toolbar.
- Click on Materials to access a library of textures and finishes.
- Use the search bar to look for “stone,” “brick,” or “cladding.”
Step 3: Apply Stone Cladding Texture
- Select a predefined stone texture from the available options.
- Drag and drop the stone material onto the selected wall.
- Adjust the scale, rotation, and tiling for a natural look.
Step 4: Upload a Custom Stone Cladding Texture (If Needed)
- Find a High-Quality Texture Image: Use free resources like Unsplash or Pexels.
- Upload to Floorplanner: Click the “Upload Custom Material” option.
- Adjust the Scaling and Alignment: Ensure it looks proportional to the design.
Step 5: Preview and Finalize
- Check the Lighting: See how the texture interacts with different lighting setups.
- Make Adjustments: Modify texture placement if necessary.
- Save and Export: Save your design and export it for presentations or further editing.
Customizing Stone Cladding in Floorplanner
Adjusting Scale and Proportions
| Setting | Description |
| Texture Scaling | Adjusts the size of the stone pattern. |
| Tiling Options | Helps align repeating patterns naturally. |
| Rotation | Alters the angle of the stone cladding for better aesthetics. |
Enhancing Realism with Shadows and Lighting
- Add natural lighting sources for realistic depth.
- Use Floorplanner’s 3D View to adjust shadows.
- Experiment with wall finishes for a polished look.
Combining Stone Cladding with Other Materials
| Combination | Best Use Case |
| Stone & Wood | Rustic or cabin-style interiors |
| Stone & Metal | Modern industrial designs |
| Stone & Glass | Contemporary urban homes |
Common Mistakes to Avoid
- Overusing Stone Cladding: It should complement, not overwhelm, your design.
- Ignoring Scaling Issues: Large stone textures can look unrealistic if not resized properly.
- Using Low-Resolution Textures: Always opt for high-quality images for a professional finish.
Alternative Tools to Floorplanner for Stone Cladding
| Tool | Features |
| SketchUp | Advanced 3D modeling and material customization |
| Revit | Professional architectural drafting with material realism |
| AutoCAD | Technical precision for building structures |
Final Thoughts
Mastering how to add stone cladding in Floorplanner can significantly enhance your designs, whether you’re working on residential interiors or large-scale architectural projects. By using the right textures, adjusting scales, and experimenting with lighting, you can achieve a polished and professional look.
Leave a Reply