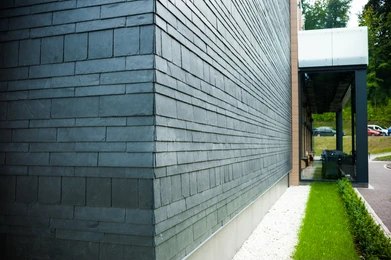
Introduction: The Problem With Poor Stone Cladding Installation
Bare concrete and brick walls lack character, while full stone walls are expensive and heavy. That’s where stone cladding shines—it delivers the luxurious look of natural stone without structural concerns. But here’s the catch: 80% of failed installations result from improper adhesive use, poor surface prep, or incorrect sealing.
If you want to learn how to put stone cladding on walls the right way—avoiding costly redos—this 3,500-word guide is your blueprint. We’ll cover:
✔ Material selection (natural vs. faux stone, best adhesives)
✔ Step-by-step installation (with pro tips most guides miss)
✔ Critical mistakes that cause peeling and water damage
✔ Long-term maintenance to keep walls pristine
By the end, you’ll confidently install weatherproof, stunning stone cladding that adds value to any property.
Why Stone Cladding? (And Where to Use It)
Key Benefits
| Advantage | Why It Matters |
| Cost-Effective | 50-70% cheaper than full stone walls |
| Lightweight | No need for reinforced foundations |
| Versatile Styles | From rugged slate to sleek marble finishes |
| Energy Efficient | Adds insulation (R-value up to 1.5) |
Best Applications
- Exterior: Elevates curb appeal on façades, garden walls, and entryways.
- Interior: Creates accent walls in living rooms, kitchens, or bathrooms.
- Commercial: Hotels, restaurants, and offices use cladding for high-end aesthetics.
Materials & Tools: The Stone Cladding Checklist
Material Comparison Table
| Type | Pros | Cons | Best For |
| Natural Stone | Authentic texture, unmatched durability | Expensive, heavy | High-budget projects |
| Faux Stone | Lightweight, affordable (from $5/sq ft) | Less durable | DIYers, rentals |
| Peel-and-Stick | No mortar needed, quick install | Prone to peeling | Temporary features |
Tool Checklist
- Adhesive Tools: Notched trowel, mortar mixer
- Measuring & Leveling: Laser level, chalk line
- Cutting Tools: Angle grinder with diamond blade
- Finishing: Grout float, sealant sprayer
Step-by-Step: How to Put Stone Cladding on Walls
Phase 1: Wall Preparation (The Most Critical Step)
- Clean: Pressure wash exterior walls; use TSP cleaner indoors.
- Repair: Patch cracks >1/8″ with hydraulic cement.
- Waterproof: Apply liquid membrane (mandatory for wet areas).
Pro Tip: Test adhesion by taping a stone tile—if it falls, the wall needs degreasing.
Phase 2: Dry Layout & Pattern Planning
- Lay stones on the ground to plan the arrangement.
- Mix sizes/colors for a natural look (avoid obvious repeats).
- Mark vertical/horizontal guidelines every 3 feet.
Phase 3: Mortar Application
- Mixing: Combine mortar powder with water to a peanut butter consistency.
- Notch Technique: Hold the trowel at 45° for optimal adhesive thickness.
Phase 4: Stone Installation
- Press tiles firmly into mortar with a slight twist.
- Use 1/8″ spacers for grout lines (critical for expansion).
- Cut edges with a grinder (wear a respirator—stone dust is hazardous).
Phase 5: Grouting & Sealing
- Grout Choice: Sanded grout for gaps >1/8″; unsanded for thinner joints.
- Sealing: Two coats of penetrating sealer (reapply every 3 years).
5 Deadly Mistakes to Avoid
- Skipping Expansion Joints → Cracks in freeze-thaw climates.
- Wrong Adhesive → Use polymer-modified mortar for exteriors.
- Sealing Before Grout Dries → Traps moisture, causes efflorescence.
- Ignoring Weight Limits → Max 15 lbs/sq ft for drywall substrates.
- Poor Slope on Exteriors → Water pools behind cladding.
Maintenance: Keep Your Cladding Like New
- Annual Cleaning: Soft brush + pH-neutral cleaner.
- Inspect Sealant: Spray water—if it beads, the seal is good.
- Repair Loose Tiles: Inject epoxy adhesive behind the stone.
Final Verdict: Is Stone Cladding Right for You?
Stone cladding is a game-changer for affordable luxury, but success hinges on proper installation. Follow this guide to avoid the pitfalls that plague 90% of DIYers.
Ready to start? Bookmark this page and share your project photos below!


Leave a Reply